


BLOG

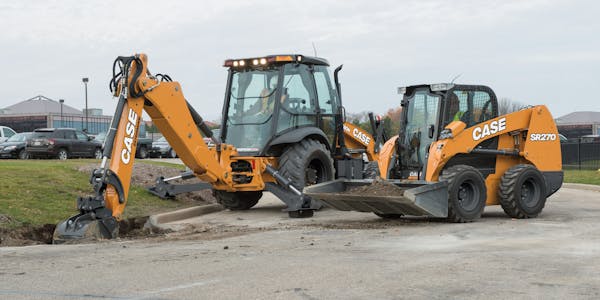
Working in Sandy Soil: How to Do It Right Whether you're excavating, hauling materials, or navigating through a site, operating in sandy soil can create issues with traction, trench stability, and various other aspects of earthmoving and construction projects. To help you avoid problems and reduce expensive downtime, we've compiled some crucial tips and recommended practices for efficiently digging and working in sandy environments. Select appropriate CTL and excavator tracks When digging in or moving across sandy terrain, maintaining sufficient traction can be challenging, particularly on slopes. We recommend opting for broad, high flotation CTL or excavator tracks. These wider tracks distribute weight more evenly, lowering ground pressure and minimizing the risk of sinking into soft, sandy ground. Pick suitable skid steer tires For non-tracked equipment like skid steers, both solid and air filled tires can provide adequate traction in sandy soil. Look for skid steer tires with deep tread patterns, as these will deliver the necessary grip to navigate effectively on loose surfaces such as sand, gravel, and similar terrains. Dig with precision and care When excavating sandy soil, it's crucial for operators to prioritize accuracy, caution, and gentleness. Looser soils are prone to disturbance, with cave ins being more likely than in denser soil types. By adopting a slower pace and steadily removing material in smaller increments, you'll improve stability, lower the risk of dangerous collapses, and increase overall project productivity. Utilize the appropriate bucket Selecting the correct type of excavator bucket or skid steer bucket is critical for successfully completing any digging or loading job. For loose, sandy soils, a general purpose excavator bucket or skid steer bucket featuring wide teeth and curved edges is usually the best option. This bucket design will minimize soil disturbance while still allowing efficient digging and movement of large material volumes. Keep your tracks clean Sandy soil can lead to friction and abrasion between components, causing increased wear on CTL and excavator tracks and undercarriages. You should check your machine’s undercarriage throughout the day and use a shovel or pressure washer to clean out built up sand and dirt. Go heavy on lubrication Because of its abrasive nature, sand can be especially harsh on your undercarriage, bucket, bushings, and pins. We advise ensuring all these components are well lubricated by applying grease multiple times throughout the day or approximately every five hours. That way, you’ll help keep sand away from sensitive parts, and any accumulated sand will be forced out when fresh grease is added. Use proper trench protection methods Installing trench protection is very important when working in sandy soil. Sloping and benching techniques, which involve angling the trench wall and creating steps for access, are generally less effective in sandy conditions due to the loose nature of the particles. Instead, we suggest using shoring and trench shields, which utilize metal supports to reinforce trench walls and prevent cave-ins during excavation work. Perform soil testing Soil tests are critical for jobsite and structural safety, especially when dealing with sandy soil. These assessments help on-site experts determine the appropriate benching, shoring, and sloping methods needed to avoid cave ins during excavation. Understanding the physical and chemical composition of your soil allows you to evaluate its weight bearing capacity for excavation and construction work, as well as determine the required level of compaction. If you have any questions about operating on sandy soil, digging in sand, or selecting the right excavator bucket or skid steer bucket, please reach out to our team today!
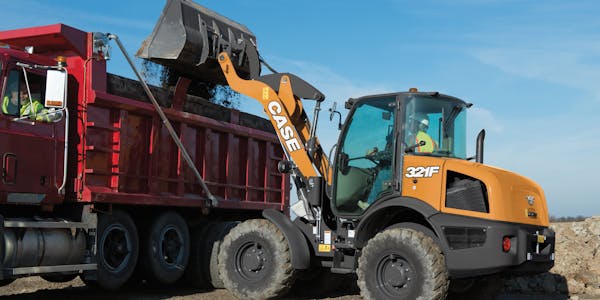
Tips for Loading Dump Trucks How to Effectively Load Dump Trucks with Your Wheel Loaders How productive you are when loading dump trucks depends heavily on the skill of your wheel loader operator and the actual capabilities of your machines. It is important to optimize the movement of your wheel loaders, so they are not traveling more than necessary or spilling material, both of which waste time and money. To enhance efficiencies and make each cycle more efficient, we've put together several key tips for your wheel loader operator. Implement the correct loading pattern The loading pattern that your wheel loader operator uses plays a large role in how productive and efficient your loading operation will be. We recommend using what’s called the Y or V pattern for loading your dump trucks with wheel loaders. This method involves positioning the dump trucks with their rear just off the edge of the pile. The wheel loader operator begins the cycle at a 45 degree angle relative to the dirt pile and the truck. Moving forward, curving to the right, the operator fills the bucket, then reverses back to the starting position at a 45 degree angle, before moving forward and curving left to dump into the truck. This path resembles a Y or V shape and optimizes the loading cycle. It is key to have your dump trucks maintain a consistent position, so your Y or V pattern is not too big or too small. You need enough space to maneuver the wheel loader effectively, but not so much space that it is traveling more distance than necessary, wasting fuel and time. Select wheel loaders with advanced features Beyond the loading patterns, choosing machines with the appropriate features significantly impacts the productiveness of your wheel loader operator. · Boom kickout sets a predetermined height for the boom when lifting, perfect for when your wheel loader operator is consistently loading a truck at the same height for an extended period of time. · Return to dig ensures the bucket starts each cycle from a predetermined point when lowering, so the bucket starts at the same position for each cycle. · Auto leveling smoothly transitions the wheel loader bucket from a dump or dig position to a carrying position, reducing operator guesswork and minimizing time consuming errors. Match the bucket to your wheel loaders and dump trucks Before beginning a substantial loading project, it is critical to determine the right bucket size for your wheel loader. Consider the dump truck capacity, the number of loads to move daily, and consult your wheel loader operator manual for maximum capacities and tipping loads. Select a bucket that allows you to fill trucks in as few cycles as possible without exceeding the machine's limits. If you have any questions about wheel loader operator tips, filling dump trucks, or wheel loaders in general, contact our team today.
Fleet Management Strategies Heavy Equipment Fleet Management Strategies The larger your grow your fleet, the more critical effective construction equipment management becomes. Properly servicing and maintaining your machines is crucial to ensuring a continued return on investment. A general rule of thumb is to replace equipment once its maintenance costs exceed 30% of the machine’s resale value. To help you keep your investment working productively for as long as possible, we’ve put together some important heavy equipment fleet management strategies that you can follow. Stay ahead of downtime We recommend enrolling your entire heavy equipment fleet into preventive maintenance contracts. It is essential to complete routine service at the intervals suggested by the manufacturer to optimize performance of your equipment and to document maintenance for warranty assurance. Proactive maintenance is a key part of construction equipment management, because it helps stabilize operational costs and lowers expenses by identifying small issues before they turn into big problems. Always follow the 80-20 rule It’s important to remember that about 80% of all maintenance costs are spent on 20% of machine problems. If you can recognize common or repeat issues and take preventive action to fix them, then you can eliminate the things that eat up your operating budget and are the main culprits behind costly downtime. Implement equipment monitoring tools Understanding how your machines are performing is a key part of construction equipment management. There are now innovative, advanced tools that accurately monitor equipment, collect data, and convert raw data into actionable information. Software is available to help fleet managers determine a machine's resale value, calculate ownership and operating costs, and estimate repairs, parts and labor expenses. If you need help understanding these tools, just ask! Conduct routine fluid analysis Regularly completing fluid analysis and comparing contaminant levels to normal wear rates helps identify potential issues with components before a major breakdown occurs. Analyzing fluids is one of the most important heavy equipment fleet management strategies we can share with you, because it gives you a picture of how your machine is working internally and will help you avoid unnecessary downtime and costly repairs. Keep comprehensive records Maintaining tight records of all the machines in your fleet will help you predict equipment productivity and operational costs, including working hours, fuel consumption, maintenance expenses, and more. Consistent, reliable information allows you to make the best decision possible when determining whether to replace or repair a machine. Keep a file for every piece of heavy equipment in your fleet and document all service and repairs. Pay attention to equipment age Generally speaking, the average total cost of owning and operating machines follows a parabolic slope. That means that total cost decreases during the early years of owning the equipment, as capital costs are spread over a longer period of time. However, operating costs increase during the same period, eventually causing an increase in average total cost. The point at which the sum of ownership costs and operating costs is at its minimum is the best age for operating your machines efficiently. One of the most crucial heavy equipment fleet management strategies is to stabilize the average age of all your machines near this point to minimize the total cost of ownership. Should you rebuild or replace a machine? Construction equipment management often involves deciding between rebuilding and replacing a machine. You can use this simple formula to calculate and compare the costs of each choice: Cost to rebuild (new equipment price x .5)/equipment life (estimated hours x .75) = cost per hour For example, a new piece of equipment that is $140,000 with an estimated life of 10,000 hours would cost $14 per hour to operate. To compare, calculate the cost to rebuild. ($140,000)(.5)/(10.000)(.75) = $9.33 per hour If the cost to rebuild is $70,000 for an estimated equipment life of 7,500 hours, at $9.33 per hour, it is more cost effective to rebuild than to replace. If you have any questions about heavy equipment fleet management strategies, contact our team today!

Hydraulic System Maintenance Tips for Maintaining Your Hydraulic Equipment Equipment hydraulic systems provide the power needed to perform heavy lifting, digging, and maneuvering tasks. To ensure the longevity and reliable performance of construction equipment, regular hydraulic maintenance is crucial. Below are the best practices for maintaining hydraulic systems in construction equipment, ensuring optimal performance and minimizing downtime. Regular inspection and cleaning The most important part of hydraulic equipment maintenance is regularly checking the system for any leaks, damaged hoses, or worn out seals. You should also pay close attention to connections, fittings, and hydraulic fluid reservoirs. Inspect the filters and screens to ensure they are clean and free from debris that can hinder proper flow. Regularly remove dirt, dust, and other particles that may accumulate on the equipment, as they can adversely affect the system's performance. Monitor fluid levels and quality Fluid is the lifeblood of the system and a key part of hydraulic maintenance. Check fluid levels frequently, following the manufacturer's recommendations. Low levels can lead to cavitation and inadequate lubrication, causing premature wear and reduced performance, while contaminated or degraded fluid can impair the hydraulic system's efficiency and cause component failures. Regularly test the fluid for contamination, moisture, and degradation, and replace it if necessary. Maintain proper fluid temperatures Hydraulic systems generate heat during operation, and excessive temperatures can lead to fluid breakdown and component failure. A key part of hydraulic equipment maintenance is regularly monitoring the system's operating temperature to ensure it stays within the recommended range. If the temperature exceeds the acceptable limit, consider using coolers or heat exchangers to regulate it. Adequate ventilation and airflow around the hydraulic components can also help dissipate heat effectively. Lubrication and seal maintenance Proper lubrication is essential to minimize friction and wear within the hydraulic equipment. Follow the manufacturer's guidelines for lubricating moving parts, such as cylinders, pistons, and bearings. Lubricate seals and O-rings to prevent leakage and to help maintain their integrity. Confirm that the lubricants are compatible with the hydraulic fluid and the system's components before applying them. Using the wrong lubricant can lead to seal swelling, reduced performance, and potential system damage. Regular filter replacement Filters play a critical role in hydraulic maintenance by capturing contaminants and preventing them from circulating in the system. Over time, filters become clogged and lose their effectiveness, compromising the system's performance. Replace filters at regular intervals as recommended by the manufacturer or based on usage conditions. Maintain system pressure and optimize settings Proper pressure settings are essential for operation of your hydraulic equipment. Regularly monitor and adjust pressure levels according to the manufacturer's recommendations. Excessive pressure can cause damage to system components, while inadequate pressure can result in poor performance. Regularly inspect and calibrate pressure relief valves to ensure accurate and consistent pressure control. If you have any questions hydraulic equipment or maintenance, then just reach out to our team today!
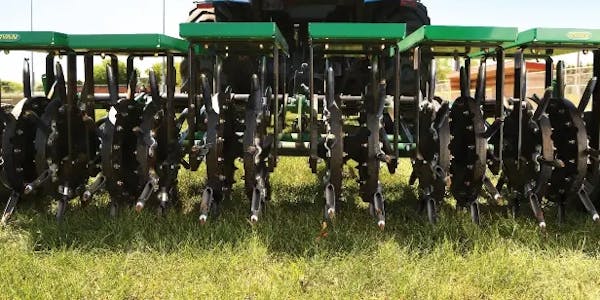
A great looking lawn is a beautiful sight, but maintaining lush, green turf requires consistently taking the right steps. Turf maintenance involves providing your grass with the necessary nutrients, water, and care to keep it healthy and vibrant throughout the year. To help you out, we’ve put together six turf maintenance tips to remember when you are working to cultivate a healthy lawn. Aerate your turf—Aerating is an effective way to reduce soil compaction and allow nutrients and water to penetrate deeper into the root system. You can use a lawn aerator or a garden fork to create small holes in the soil. Aerating your turf six to eight times a year can improve soil health and promote healthier turf growth. Fertilize regularly—Fertilizing is an essential task for turf maintenance. Fertilizers provide essential nutrients, such as nitrogen, phosphorus, and potassium, which are necessary for healthy growth. Choose a fertilizer that is suitable for your turf type and apply it according to the manufacturer's instructions. A regular fertilizing schedule can keep your lawn healthy and vibrant throughout the growing season. Water your lawn correctly—Watering the correct way is crucial for maintaining healthy turf growth. It’s important to water grass deeply and infrequently, rather than shallowly and frequently. This approach encourages deep root growth, which makes your turf more resilient to drought and other stress factors. Use a sprinkler or irrigation system to water your lawn, and avoid overwatering, which can lead to fungal growth and other turf diseases. Plus, always water at night or in the morning or evening. Avoid the hottest part of the day when you will lose water to evaporation. Mow regularly—Mowing is an essential aspect of turf maintenance. Regular mowing promotes healthy turf growth and prevents weeds from taking over. Choose the right mowing height for your turf type, and avoid cutting too low, which can damage the grass blades and root system. A general rule of thumb is to mow no more than one third of the grass height at a time. Control weeds—Weeds can quickly take over your turf, so it's essential keep them away from the turf. You can use herbicides or manually remove the weeds, but be sure to choose a method that is suitable for your turf type and safe for the environment. If clearing weeds from a smaller area, then removing them by hand is your best option. Repair bare spots—Bare spots can be unsightly and make your lawn more susceptible to weeds and turf diseases. Repair bare spots by raking the area and adding new grass seed or turf. Keep the area moist until the grass seed has germinated and established a strong root system. Following these steps consistently will make turf maintenance easier and more successful, providing you with a healthy, resilient lawn. If you have any questions about maintaining your turf, then contact our team today!
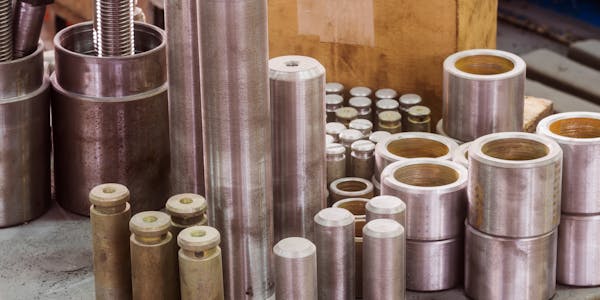
Tips for Avoiding Wear on Pins and Bushings Pins and bushings are often the first structural components that require maintenance. Depending on the material you're working in, like soil, rock, gravel, or pavement, how much you use the machine, and who the operator is, pins and bushings may wear slower or faster. We've put together several tips to help slow wear rates of pins and bushings on your tracked equipment. Why should you care about pin and bushing wear? Replacing a damaged pin and bushing can cost several hundred or a few thousand dollars. Plus, your equipment may need to be transported to an offsite workshop to complete the replacement, leading to costly downtime. If the worn pin or bushing has damaged the structural steel of the equipment, you might be faced with the cost of replacing the pin and bushing and the repair costs for line boring, welding, and refitting. There are two primary ways to avoid pin and bushing wear and avoid these costs and downtime: lubrication and turning. Ensure Proper Lubrication Pins and bushings wear excessively when there's a lack of lubrication, and they don't wear evenly. The pin wears on the side that makes contact with the bushing and wears on the mating surface of its inner diameter. Worn pins and bushings lead to tracks' stretching (called pitching), which decreases the performance of the tracks and has negative impacts on the life of your undercarriage. Most pins and bushings today have 'grease grooves' on the inner diameter where lubricants form a film layer for the pin to rotate on. Adding lubricant at the intervals recommended by the manufacturer slow wear rates and help purge contaminants from the bushing by forcing out foreign materials from the grooves. Pin and Bushing Turning In order to avoid pitching, pins and bushings can be regularly turned, so the wear side is not along the side that makes contact with other components. The pin and bushing turning provides new surfaces to working areas both internally and externally. By bringing new surfaces to working areas, the wear for the difference in load is more evenly distributed. Turning restores pitch on the track between pins and can prolong undercarriage life by enabling the chain to last until links and rollers need attention. It's a good idea to check your pins and bushings before you bring out your machine for the season. If you see your tracks pitching, you know you have to address the pins and bushings. How often pins and bushings need to be turned can vary based on the conditions of your working environment, but you will likely need to do it at around 2,000 hours. If you have any questions about pin and bushing wear or need us to handle turning or replacement, contact our team today!
Fluid Maintenance It is especially important to monitor fluid levels in your equipment during the summer months when temperatures are high. The summer heat will cause the engine to warm at a faster rate. As the engine warms, the machine’s fluids will suffer vaporization loss, eventually leading to a lower fluid level. Perform daily checks on the hydraulic fluid, coolant, and machine’s oils to ensure that the equipment will not run into problems while operating. Fluids to Check Hydraulic fluid Hydraulic fluid is used to transmit the force required to operate the machinery and to lubricate the hydraulic system and protect it from corrosion. Low hydraulic fluid levels will cause the machine to overheat and reduce the power of the equipment. Before checking the level of hydraulic fluid, make sure the machine is on even ground. The fluid should be kept at the level indicated on the tank’s gauge. Coolant Coolant keeps an engine running at peak performance in all temperatures. Coolant adds antifreeze and corrosion inhibitors, to prevent freezing, corrosion, cavitation, and rust. Operating with low coolant can lead to major problems, because unprotected surfaces could sustain damage. When checking coolant levels, allow the engine to completely cool. Then, locate the coolant reservoir and fill the tank to the indicated line. Oils - engine, transmission, gear Engine oil is used mainly to lubricate parts. It also cleans, inhibits corrosion, improves sealing, and cools the engine by carrying heat away from moving parts. To check the engine oil level, some machines require a dipstick inspection while others require removing the fill cap to check that the oil is at the fill line or the top of the fill hole. Transmission oil lubricates the transmission gears and helps keep the transmission operating temperatures reduced. To check the transmission oil, turn off the engine and locate the transmission dipstick. The level should be just under the full mark. Gear oil lubricates gear teeth and helps prevent the machine from overheating. When checking the lubricant level, make sure the gear oil is at the level of the filler plug. Fluid level is critical to effective and efficient operation. Additional Fluid Questions? Contact your local branch with your fluid maintenance questions. Be sure to ask about fluid analysis to track contaminant levels in your equipment’s fluid, so we can predict component failure. We will provide guidance and oil change intervals, based on the results for your equipment.
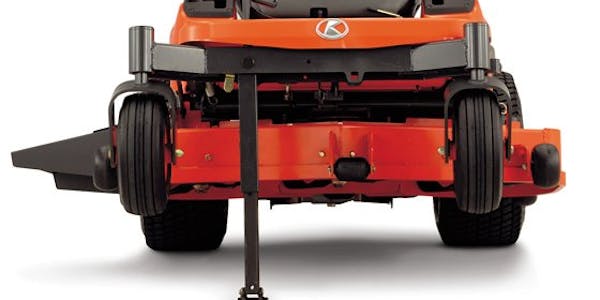
The Most Important Lawn Mower Maintenance Tips Get a jump on the Spring mowing season. Your mower works hard every day, and you depend on it for your business. To help you keep it as productive as possible during the upcoming season, we have put together some of the most important lawn mower maintenance tips. Change the oil To avoid problems with your mower operating properly, change the oil regularly. When spring is coming, it is the perfect time to complete this important task. In order to protect your lawn mower engine, we recommend changing the oil at least once a year or after every 50 hours of use, whichever comes first. If you are operating in especially dusty or dirty conditions, you may need to change it more frequently. Check your owner’s manual to determine which type of oil is best for your machine and follow the manufacturer’s recommendations for oil change frequency to avoid issues requiring mower service. Inspect your spark plugs One of the most important lawn mower maintenance tips is to ensure your spark plugs are in good condition before the busy season starts. A loose or dirty plug will make the mower difficult to start, waste fuel, and cause it to run choppy, producing poor cutting results. We recommend pulling off your mower’s spark plug wire, removing the plug, and using brake cleaner and a wire brush to gently clear any dirt or signs of corrosion. After removing the dirt and grime, buff the plug with a soft cloth, and then reattach it. Replace your mower’s engine air filter The next important lawn mower maintenance tip is to swap out the air filter. A dirty or clogged filter will put extra strain on your engine and keep your mower from operating as efficiently as it otherwise would. By changing the air filter this spring, your machine will breathe easy, run better, and you can avoid costly mower service down the road. Clean the mowing deck If your mower deck is clogged with grass and debris, it won’t cut as efficiently and can lead to accelerated corrosion. A dirty mower deck can also spread plant diseases from property to property. A good lawn mower maintenance tip is to use a brush and soapy water to remove any other dirt and debris. Once the area is dry, coat the underside of your mower with a thin layer of vegetable oil in order to prevent debris from sticking to it. Sharpen the blades Your blades are the money makers on your lawn mower. To ensure a great cutting performance this spring and summer, remove the blades from your mower and take them into your nearest Burris Equipment location so they can be sharpened. If you have the right skills, tools, and equipment, you can also sharpen them yourself. Be sure to check the balance. Check the tire pressure Under or overinflated tires can cause uneven mowing and add additional stress on the blade and internal components that can lead to performance issues and costly mower service. Check the tire pressure before each shift to make sure they are inflated to the manufacturer’s recommended levels. If you have any questions about these lawn mower maintenance tips, then please reach out to our team today!
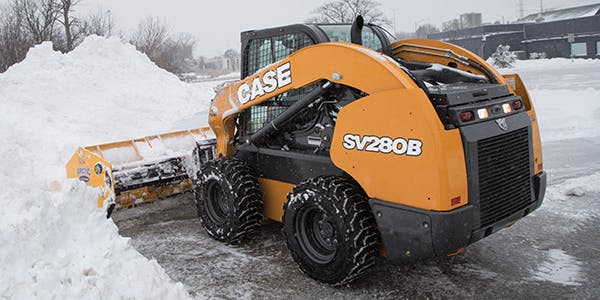
Dealing with Changing Tire Pressure During the Winter Underinflated tires are a drain on your business. Low tire pressure increases fuel usage and wear. Follow these best practices to get optimal performance from your equipment. Check tire pressure regularly You can't check tire pressure with a visual inspection. Many tires will look properly inflated even if they're not, which is why it's important to check regularly with temperature changes. In the winter, check tire pressure weekly. The best time to ensure an accurate reading is before you operate the machine or three hours after shutting down. A general rule of thumb is that 10° F air temperature change correlates to a tire pressure change of 1 psi. Measure tire pressure at the working temperature Don't measure tires in a warm shop if you'll be working in the cold. Make sure you're taking accurate tire pressure readings in the setting that the equipment will be used. Inflate tires with nitrogen To combat pressure fluctuations, consider using nitrogen to fill your tires. There's no added risk of combustion or fire and it prevents ice crystals from forming that could hold open the tire's valve stem. When inflating your tires with nitrogen, continue to fill the tire to the manufacturer's recommended psi. Slowly roll tires if they have been sitting for long periods in cold weather When first using a machine after it has been parked, gradually move the machine at first. Cold temperatures can cause the contact surface of tires to go flat against the ground and this will allow the tires to return to their correct shape. As temperatures warm, continue to keep an eye on tire pressure Don't let your tires over inflate as temperatures increase. Faster, irregular wear can occur, shortening the tire's life. Measuring tire pressure regularly throughout any temperature fluctuation ensures you'll be working at optimal pressure.
Categories
Most Recent